Use this guide to choose software testing tools for a project, connect them to your code, run checks, and interpret the results. It is for developers, testers, and small teams starting or improving a testing workflow. You will finish with a basic set of repeatable checks and a way to confirm they ran correctly. Allow 1–2 hours for an existing project; setup time varies by language and application.

Get business pricing on monitors, keyboards and dev gear
- Business-only prices and quantity discounts
- Tax-exempt purchasing
- Multiple users, one account, clear invoices
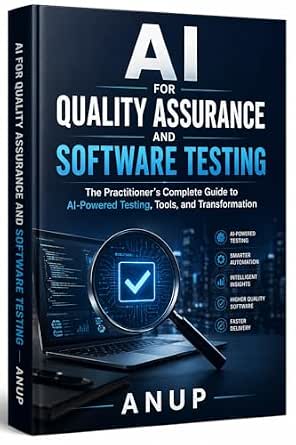
AI for Quality Assurance and Software Testing: The Practitioner’s Complete Guide to AI-Powered Testing, Tools, and Transformation
- ✔ Format: Book; exact format not specified
- ✔ Subject: AI in quality assurance and software testing
- ✔ Coverage: Tools, methodologies, and transformation

Crisis Engineering: Time-Tested Tools for Turning Chaos into Clarity
- ✔ Format: Book; exact format not specified
- ✔ Subject: Crisis management and emergency response
- ✔ Coverage: Strategies and tools for managing crises
Difficulty: Beginner | Time: 1–2 hours
What You’ll Need
Tools & Materials:
- A computer with the project’s development environment installed
- Access to the project source code and its package or dependency manager
- A terminal or command prompt
- A test framework compatible with the project’s programming language
Knowledge:
- Basic familiarity with the project’s language and how to run the application
- Ability to install project dependencies and run a command in the project folder
Start with a small, representative application or feature. Use the project’s existing conventions where possible. If the codebase already has test tools configured, inspect and run them before adding new tools.
AI for Quality Assurance and Software Testing: The Practitioner’s Complete Guide to AI-Powered Testing, Tools, and Transformation
This is the most direct fit for readers comparing resources on software testing tools. Its described scope combines AI concepts, practical tools, methodologies, and strategies for incorporating them into QA workflows. That breadth is useful when a team needs to think beyond a single tool choice and consider how testing practices might change across a project or organization.Compared with Crisis Engineering, this guide stays much closer to software quality work: the crisis book focuses on managing emergencies, not designing or improving tests. The AI guide also appears to address organizational change alongside technical implementation, which matters when a testing workflow affects multiple roles. The tradeoff is depth and accessibility. Readers without QA or AI background may find the material demanding, and its stated focus on certain industries may limit how readily every example transfers to other contexts.We would choose it for a QA professional or technical lead exploring AI-assisted testing and planning adoption. We would skip it if we need a beginner’s introduction to software testing fundamentals or a broad, vendor-neutral reference applicable to every industry. The listing describes a book, so readers should view it as guidance about tools and practice rather than as a standalone software product.
Pros:
- Directly addresses quality assurance and software testing.
- Covers AI concepts, tools, methods, and workflow integration.
- Includes practical examples and step-by-step implementation guidance, according to the description.
- Considers organizational change as well as technical adoption.
Cons:
- May be difficult for readers without QA or AI experience.
- The described industry focus may make some examples less transferable.
Best for: QA professionals and technical leads who understand testing basics and want guidance on integrating AI methods and tools into established workflows.
Not ideal for: Complete beginners seeking a gentle introduction to QA, or teams looking for an immediately usable software platform instead of a guide.
Bottom line: For readers seeking a software testing resource, this is the clear pick of the two, provided its AI emphasis and assumed background match their needs.
“For readers seeking a software testing resource, this is the clear pick of the two, provided its AI emphasis and assumed background match their needs.”
Crisis Engineering: Time-Tested Tools for Turning Chaos into Clarity
Crisis Engineering ranks second because its stated tools serve a different purpose from software testing. It explains strategies for managing crises and translating emergency-management concepts into actionable steps for professionals and organizations. That could be relevant to a software team preparing for operational disruption, but it does not claim to teach test design, quality assurance, or AI-assisted testing.Where the first book addresses QA workflows directly, this one is about maintaining clarity and coordination under pressure. Its accessible writing may help readers who want practical crisis-response guidance without starting from abstract theory. The limitation is straightforward: buyers searching for software testing tools would need another resource for test automation, QA methods, or software-specific practices. The description also cautions that the material may feel dense to readers who want only a quick set of tips.We would consider this book as an adjacent resource for professionals responsible for organizational crisis planning. We would not select it as a primary purchase for learning software testing. Its value in this comparison is conditional on that broader operational need, while the AI guide remains the relevant option for QA readers.
Pros:
- Focuses on practical crisis-management strategies.
- Translates emergency-management ideas into actionable steps, per description.
- Written in a clear, accessible style.
- May complement operational planning for teams facing disruption.
Cons:
- Does not directly address software testing or quality assurance.
- May be dense for readers seeking only quick, superficial tips.
Best for: Professionals and organizations seeking structured, actionable guidance for crisis management and response.
Not ideal for: Readers specifically seeking software QA methods, testing tools, test automation guidance, or a quick overview of testing basics.
Bottom line: A possible companion for crisis planning, but its subject makes it a poor substitute for the AI-focused software testing guide.
“A possible companion for crisis planning, but its subject makes it a poor substitute for the AI-focused software testing guide.”
As an Amazon Associate we earn from qualifying purchases.
Before You Start
Testing tools serve different purposes. Unit test frameworks check small pieces of code, browser automation tools exercise user flows, API clients or test libraries check service responses, and static analysis tools flag code issues without running the application. Choose based on the risk you need to check; adding every category at once makes setup harder to maintain.
Use a test or staging environment for checks that create, change, or delete data. Do not point automated tests at production unless the tool and test plan are explicitly designed for that use.
Step-by-Step Instructions
Step 1: Define what you need to test
Choose one feature or risk, such as a calculation, a sign-in flow, or an API response. Write down the expected behavior and one failure case. For example, a sign-in test might verify that valid credentials open the account page and invalid credentials show an error.
Tip:Keep the first target narrow. A clear expected result makes tool selection and debugging easier.
Check: You have a short list of behaviors that can be checked as pass or fail.
Step 2: Check the project’s existing setup
Open the project’s readme, dependency files, and test folders. Look for a test command, an existing test framework, CI configuration, or browser automation setup. Run the documented test command from the project folder and record any errors.
Tip:Do not install a second tool that duplicates an existing one until you know why the current setup is insufficient.
Check: You know which tests already exist and whether they run in your local environment.
Step 3: Choose tools that match the target
Select one main tool for the behavior you chose. Use the language’s established unit testing framework for isolated code, a browser automation tool for user interface flows, or an API testing library for service requests. Add a static analysis or coverage tool only if it answers a specific need, such as finding risky patterns or showing which code tests exercise.
Check that the tool supports your language version, operating system, and application framework. Review its documentation for installation and basic usage before committing to it.
Tip:Prefer tools that the team can run locally and in its continuous integration system with the same commands.
Check: You can name the behavior the tool will check and confirm the tool supports your project.
Step 4: Install and configure the selected tool
Install the tool using the project’s package manager or the setup instructions in its official documentation. Add configuration in the project rather than relying on personal machine settings. Set the test file location, environment variables, and any required browser or service endpoint. Keep secrets out of source files; use local environment settings or the team’s secret manager.
Tip:Install only the dependencies needed for the first test. Extra plugins can wait until the basic run works.
Check: The installation completes, and the tool’s version or help command runs without an error.
Step 5: Create one focused test
Add a test for the expected behavior you wrote down. Give it a descriptive name, arrange the required input or test data, perform the action, and assert the visible result or returned value. Keep test data isolated from real user data. If the tool supports setup and cleanup hooks, use them to prepare and remove temporary records.
Tip:Make the test independent of test order. It should pass when run by itself, not only after another test has prepared hidden state.
Check: The test describes one behavior and contains a clear assertion that can fail when the behavior is wrong.
Step 6: Run the test and inspect its output
Run the project’s test command or the tool’s command for the new test. Read the full output, including the name of the test, any error message, and the file and line reported. If the test fails, compare the actual result with the expected result and determine whether the code, test data, environment, or assertion caused the mismatch.
Tip:A failing test can indicate a setup problem rather than a product bug. Confirm required services and environment variables are available before changing application code.
Check: The tool reports the test as passed, or reports a failure with enough detail to locate the cause.
Step 7: Add a failure case and repeat the run
Create a second test for the likely error condition, such as an invalid input, missing field, unavailable record, or unsuccessful response. Run both tests again. Confirm that the failure case checks the intended error behavior and does not pass merely because the application crashed or the test could not connect.
Tip:Use the application’s documented error result as the expected outcome. Avoid assertions that only check that “something happened.”
Check: Both the normal and failure cases produce the expected results when run together.
Step 8: Record the repeatable workflow
Document the tool name, installation or setup requirements, test command, and any required test environment in the project’s readme or contributor notes. If the project uses continuous integration, add the same test command to its existing workflow after confirming it works locally. Keep reports and generated test data in the locations recommended by the project.
Tip:Run the documented command from a fresh terminal or clean checkout when possible; this can reveal hidden local dependencies.
Check: A teammate can find the instructions and run the same checks without relying on undocumented steps.
Common Mistakes to Avoid
- Choosing a tool because it is popular without matching it to the behavior being tested. — Write the target behavior first, then select a tool that can exercise it directly.
- Adding several frameworks or plugins before the first test runs. — Start with one tool and one test, then expand when a concrete gap appears.
- Using production data or services in tests that modify records. — Use isolated test data and a test environment, with cleanup for created records.
- Writing tests that depend on a specific run order or hidden setup. — Give each test its own setup and cleanup, then run tests individually and together.
Troubleshooting
Problem: The test command is not recognized or no tests are found.
Solution: Check that you are in the project root, the tool is installed in the project environment, and the test file follows the configured naming and directory rules. Compare the command with the project documentation.
Problem: The test cannot connect to a database, API, or browser.
Solution: Confirm the required service is running, the test endpoint is correct, and required environment variables are set. Use test credentials and verify the test environment is reachable before rerunning.
Problem: A test passes locally but fails in continuous integration.
Solution: Inspect the CI log for missing dependencies, environment variables, browser packages, or different runtime versions. Align local and CI versions and avoid relying on files or services that exist only on your machine.
Problem: The test result changes between runs.
Solution: Look for shared test data, reliance on execution order, current time, random values, or external services. Isolate the data and control or stub unstable inputs where practical.
What Success Looks Like
You have at least one selected tool installed in the project, a documented command that runs it, and focused tests for a normal case and a failure case. The command produces readable pass or fail output, and a teammate can follow the setup notes to repeat the run. Test data is isolated from production, and failures point to an actionable location or cause.
Next Steps
Add tests when you change behavior, starting with areas that carry the most risk or have caused defects. Review test failures as part of code review, keep dependencies updated through the project’s normal process, and remove tests that no longer reflect intended behavior. If the test suite becomes slow, identify the slowest checks and decide which should run on each change and which can run on a schedule.
Frequently Asked Questions
Do I need more than one software testing tool?
Not at first. One framework that checks your first target is enough to establish a repeatable workflow. Add another tool when you need a different kind of check, such as browser interaction or static analysis.
Should I use a testing tool’s coverage report as proof that the code is reliable?
No. Coverage shows which code ran during tests, but it does not show whether the assertions checked the right behavior. Review test cases and expected results alongside coverage.
Can I run automated tests against a live website?
Use a test or staging environment for tests that submit forms, change settings, create accounts, or delete data. A live site is suitable only for checks designed to avoid changes and approved for that environment.
What should I do when a test fails after a code change?
Read the failure message and compare actual behavior with the expected result. Check whether the test expectation is still correct; if it is, fix the behavior and rerun the test and related checks.